
The dripping winner!
In our post titled Strawberry rhubarb ice-cream, I took pictures of Talia’s perfect creation of a cup of ice-cream on a rustic table background with strawberries scattered around. I will explain what went into taking the picture and making it look mouthwatering.
The setup was as follows:
Light: south facing window to the left
Reflector: about one foot away from the ice-cream to the right reflecting the light on to the right side of the strawberries
Distance from light: ice-cream ‘table’ (and more on that later) was set up about four feet away from the window.
Time and weather: around 6:15 p.m. on a slightly overcast day
Camera and Lens: Digital Rebel Xti; 100mm lens
Shooting method: Camera was set on a tripod and connected to laptop with remote shooting enabled through EOS utility software.
Constant settings: Aperture Priority Mode; ISO 100; exposure bias: 0.33
Mysterious tabletop: The table top we used was something we bought from BargainOutfitters. It’s actually like a giant mouse pad and has the image of an old table imprinted on it! This is a great idea if you don’t have room to store a real table top you might buy. You can just roll this up and put it away. It is very portable and its very difficult to tell the difference between this and the real thing. Until we become really good and have a prop room, we will stick with this.

Talia set up the ice-cream scoop in a cup with a spoon and scattered the strawberries. The table top ‘giant mousepad’ was laid on a foam core board, on top of an ottoman.
I chose the angle I was going to shoot from. This angle was good I thought because it showed a good distance between the scattered strawberries. A lower angle would make them look too close; a higher angle would not show enough of the cup. After choosing this angle I shot one picture to check out the exposure and the layout of the strawberries. I quickly realized that the ice-cream had melted significantly and the strawberries were not scattered in a way that appealed to the lens (low lens appeal)! The best thing about the photo was that the spoon caught the light from the window and looked nice and bright.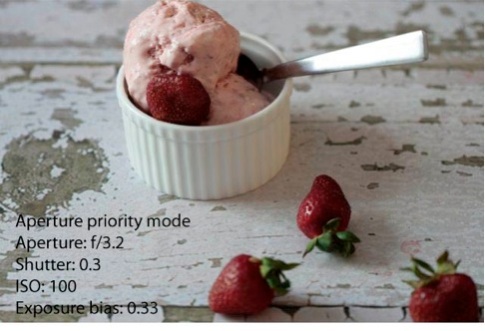
Next we turned the cup around and added one more strawberry to the ‘table’. The added strawberry we realized after the next shot was not the most gorgeous and looked too big. The strawberry in the cup was also stuffed in there and looked ‘flat’. The angle of the spoon made it look dull grey. The reflector was not used because since Talia is the official ‘reflector holder’ she was busy in the kitchen and thus not performing her reflector holding duties!
We then rotated the cup to show the second scoop, adjusted the spoon to look more shiny, removed the unflattering strawberry, and added a more handsome strawberry in a distance so the depth of field would look more interesting by blurring out the strawberry in a distant. Please note several other shots were taken in between.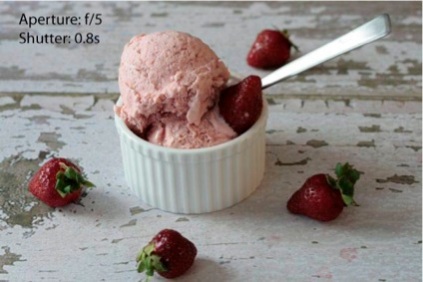
Now that we got the shot we wanted I asked Talia to make the ice-cream melt and drip on the side. She took the already melting second cup, and strategically placed melted ice-cream with a spoon on top of the scoop and I clicked away to catch the drip in action. Here are six ‘action shots’.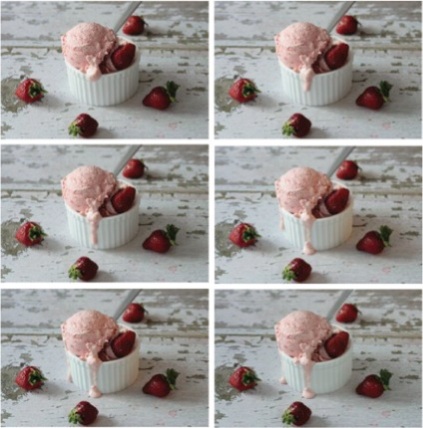
The final image was chosen and rotated to be plumb; levels, sharpness and saturation were adjusted. For this photo shoot we took 17 pictures. See our best picture at the top! Happy shooting!
-by Noerah


 "
"
No comments:
Post a Comment