This post has been a long time in the making. Back in March when my Irishman and I decided to give it another go, we came up with a brilliant plan. We would try and swing things so we could live 3 weeks every month in the snowy mountains where my Irishman works and spend the other week based in Sydney. All my life I’ve dreamed of having the balance between city and country living. I couldn’t believe we’d figured it out so soon.
All my life I’ve also dreamed of being able to bake amazing bread. So with this move to country living, with no access to good local bread, the time was right. My first port of call was the wonderful Bourke Street Bakery cookbook to get my sourdough culture going. And while the results were OK, flavourwise. The texture was no where near as light and airy as I would have liked. Plus it was wickedly time consuming kneading each loaf for half an hour.
For a week or so I battled with my minimalist tendencies to not acquire any more kitchen equipment and the need for a stand mixer with a dough hook to improve my bread making attempts. And then I had a stroke of genius. Years ago Mark Bittman had written about a no-knead bread that the blogosphere went a bit crazy about. Maybe that was the solution?
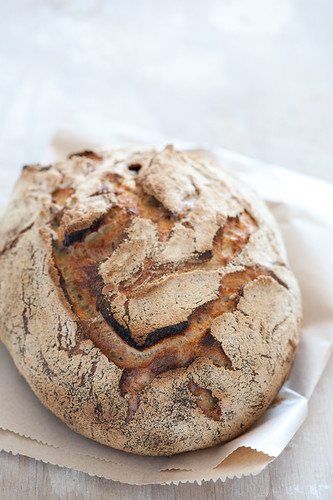
My first attempt, using yeast was so wonderful. I almost couldn’t believe that I’d been able to make such a gorgeously imperfect loaf. Actually it starred in a post I wrote about living on $2 a day.
The next logical step was to take this method and convert it to a sourdough recipe. And the rest is history really.
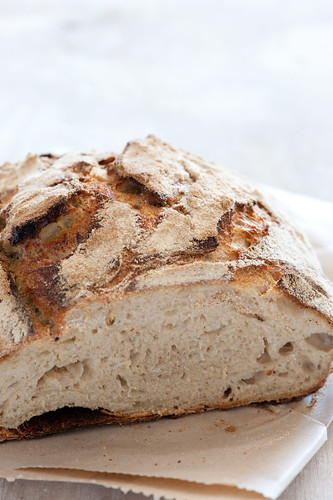
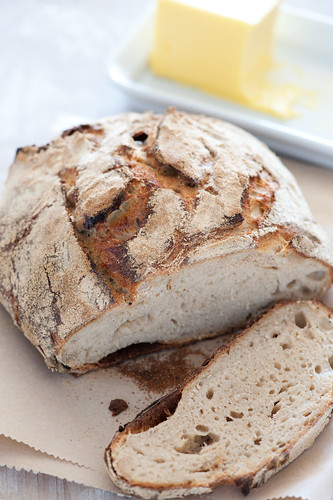
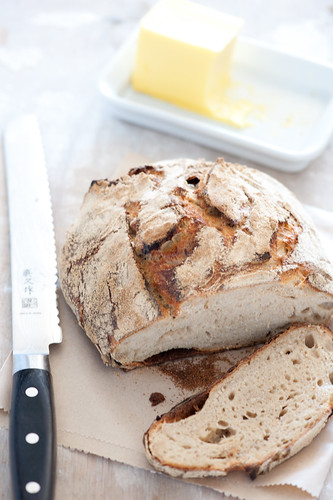
rustic homemade sourdough
makes 1 loaf
In the early days of your starter you can use it for the extra flavour but you’ll need to use 1/4 teaspoon dried yeast to work it’s magic. But once your starter is active and bubbling away, you can ditch the yeast. Just make sure you don’t put any of the commercial yeasted dough near your starter or these stronger strains will takeover. Good idea to always use a clean spoon when making your starter.
I prefer to use unbleached, stone ground organic bread flour and filtered water, but I’ve also used supermarket flour with great results.
325g (11oz) bread flour
200g (8oz) sourdough starter, recipe below
275g (10oz) water
1 teaspoon find grained salt
semolina, optional
1. In a large bowl combine flour, starter, water and salt until just mixed together.
2. Cover with cling wrap and leave overnight for at least 8 but preferably 12 hours.
3. Form your loaf. Place a generous amount of flour on your kitchen counter. Scoop dough out onto the flour then sprinkle generously with more flour. Gently fold the edges from the outside in to form a round loaf.
4. Place more flour on a clean tea towel. Place loaf with the rough top side down. Sprinkle with semolina, if using, or more flour. Cover.
5. Place a large oven proof dish with a lid in the oven. Preheat oven and the pan to the highest setting for at least 1/2 hour.
6. Carefully remove the hot pan from the oven. Remove lid. Sprinkle a little semolina, if using in the base of the pan. Gently place loaf in the pan inverted so that the rougher surface is now on top. Don’t worry about smoothing it out or having it centered – it will work itself out in the oven.
7. Pop the lid back on and bake for 30 minutes.
8. Remove the lid and turn the oven down to 200C (400F) bake for a further 15 minutes until the loaf is deep brown.
9. Cool on a wire rack uncovered for at least 30mintues if you can wait that long.
rustic homemade yeasted bread
makes 1 loaf
The method is basically the same, but instead of the starter you just use more flour and water and some yeast. This is a great way to see how wonderful homemade bread can be.
425g (15oz) bread flour
375g (14oz) water
1 teaspoon find grained salt
1/4 teaspoon dried yeast
semolina, optional
1. Follow method above but add the yeast at the same time as the salt in step 1.
how to make a sourdough starter video
sourdough starter
From day 3 you can start using your sourdough starter to add flavour to your bread and keep supplementing it with yeast until it is active enough to go it alone.
Once you have the starter established, just keep it in the fridge and feed it about twice a week, or more often if you’re making bread regularly. If you need to go on holidays you can give it a massive feed but I wouldn’t be keen to leave it for longer than a week. You’ll know if it dies because you’ll get awful looking mould growing on the top. It happened to my first culture. But don’t stress if you have a starter death on your hand. You’ve made it once you can make it again.
This would be a great project to do with children. It’s like having a new pet that doesn’t need toilet training!
The wonderful flavour of great sourdough is a result of particular strains of lactic acid bacteria. To encourage these little creatures to grow in your culture, I like to use natural yoghurt. But if you wanted to keep it dairy free you could skip the yoghurt or use a few organic grapes.
bread flour
water
natural yoghurt
day 1: In a clean bowl or jar, mix together 50g (2oz) flour, 50g (2oz) water and 2 tablespoons organic natural yoghurt. Cover with cling wrap and leave somewhere warm.
day 2: Using a clean spoon, add 100g (4oz) flour and 100g (4oz) water. Mix to combine. Recover and leave in a warm place.
day 3: Today you can make your first loaf. But you’ll need to use some yeast as well. When you’ve removed 200g starter. Replenish with 100g (4oz) flour and 100g (4oz) water. Mix to combine. Recover and leave in a warm place.
day 4 onwards: Remove 200g starter and either use it to make bread or throw it away. Using a clean spoon replace with 100g (4oz) flour and 100g (4oz) water. Mix to combine. Recover and leave in a warm place
somewhere between about day 10 and day 15 Your starter should start to show signs of life. Basically it will start to bubble. When this happens you can stop using the yeast in with your bread. And you can start to keep the starter in the fridge and stop feeding it everyday. Aim to feed it (remove 200g (8oz) and replace with 100g (4oz) each flour and water) twice a week or more often if you’re baking more frequently.
___________________________________________________________________
Have had a wonderful response to my Stonesoup Virtual Cookery School. I have a mother and daughter signed up to learn together – maybe it’s something you could share with a loved one. The price covers everyone in your household. If you haven’t already done so, why not check out the very first class called Solve Your Dinner Dilemma starting October 24th.

Share
No comments:
Post a Comment